- upload photo for quotation
- Prices From only £9.99
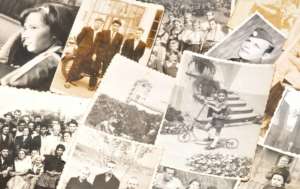
Everyone loves photos. It’s why Instagram has over 600 million active users, and why sites like AwkwardFamilyPhotos get so popular that they’re given book deals.
Point-and-click cameras and smartphones may have moved photography into the digital age, but many people still prefer physical prints to JPGs.
If you doubt the power of physical photographs, pull out an old photo album at your next family gathering. Then watch as everyone becomes transfixed on the memories they hold in their hands.
Physical photos do have one glaring weakness: they can become damaged. Despite this, you shouldn’t take your old damaged photos to the bin. There are a number of ways to breathe new life into the photographs that you’ve given up on.
In this article, we’ll take a look at five ways to bring your old damaged photos back from ruin.
While we all know the importance of proper photo storage, accidents still happen. One of the most common problems with old damaged photos is water damage. If this has ever happened to you, you’re familiar with the headache.
Stacks of pictures all stick together. Photos stick to the glass in their frame. You try to pull apart, but they won’t budge without tearing or peeling.
You might think that your water damaged photos are done for. But don’t fret: there’s a simple–yet delicate–solution to this.
Photographs are coated in a type of gelatin. When they become wet, the gelatin softens. While this is how photos become stuck in the first place, it can also be used to fix them.
Purchase a bottle of distilled water at a grocer’s or pharmacy. Pour it into a small container big enough to completely cover the photos.
Place the stuck photos in the water, image side up, and let them sit. It might take twenty or thirty minutes for the gelatin to soften enough to separate the photos.
Gently separate the photos using a finger or a spatula. This will also soften the paper and make it more susceptible to tears, so take caution.
Once you are able to free the photos, lay them image side up on a towel to dry. You might want to lay a book along the edges to prevent them from curling as they dry.
If your photo is stuck to the glass of its frame, water can cause the photo to smear on the glass. You’re going to need a different method.
Before you try anything, you want to make sure you get a digital copy of the picture. You can lay the photo and the frame onto a scanner and go from there. Once you have your digital copy, take a blow dryer and turn it to low heat.
Holding the blow dryer about 10-12cm from the photo, heat it from the back. After heating it for a few minutes, gently pull back on a corner.
It should pull back quite easily, so if you get any resistance, stop and heat it some more. Be careful not to pull back at too sharp an angle, or you may crease the photo.
Torn photos are one of the most heartbreaking things can happen to your mementoes. But with a little patience, you can mend the tears in your old damaged photos.
Prepare your workstation by clearing of it all dust and debris. Specks of dirt can cause scratches to the surface of your image and make more work for you.
Take two sheets of clean cardboard and lay one on the clean surface. Carefully arrange the fragments of your torn photos on top of the cardboard.
Gently place the second sheet of cardboard on top of the recreated photo. Pick up both sheets of cardboard and flip it over so that the photograph is now image side down.
Lift the top piece of cardboard slowly, so as to not move the pieces. Using acid-free tape or a mending strip, tape all of the pieces into place.
It’s important to note that regular tapes use a sort of acid in their adhesive. Over time, this acid will damage your photos. Most stationery stores sell acid-free, acrylic or archival tape that will do the job.
If you use a mending strip, you will need to dab a small amount of glue on the back of the paper. Press the mending strip into place. Use a cotton swab to get rid of any excess glue.
Let the photo dry image side down on a towel under a book to prevent curling.
If your photo is particularly delicate, make a copy of the photo before attempting to repair any tears. The only thing worse than an old damaged photo is an old damaged photo that you ruin beyond repair.
Just like everything else in life, photos can accumulate all sorts of dirt and grime. Dust collects and gets embedded on the image surface. Sometimes, mould or mildew grow on old damaged photos stored in damp places.
For photos with a small amount of dirt, you might be able to clean them with your finger, canned air, or a photo brush.
Just take care that you don’t press too hard, or the dirt can scratch the surface of the photo. Using a washcloth or rag can also damage your photo. If your photo has any tears, canned air might make them worse. If the dirt is a little more stubborn, rinse the surface of the photo under lukewarm water to loosen up the dust and dirt.
For those real grimy photos, you need to get a little more serious. Gently wipe down the photos using an emulsion cleaning fluid or isopropyl alcohol. Follow the manufacturer’s instructions carefully to avoid damage.
If you have never used emulsion cleaning fluid before, it’s recommended to try it first with a photo that holds little sentimental value.
Do you have any old damaged photos with curled or bent edges?
There are a number of ways to flatten a photo!
The simplest method is to put your photos under a heavy book. In time, it will be retrained to lay flat. You may want to put your photo inside the book for the same effect.
For those of you who are a little less patient, you can use a clothing iron. But if done incorrectly, this can permanently damage your photos, so be careful!
Press your photo between a few sheets of tissue paper. Use as many layers as you feel you need to in order to protect your old damaged photos.
Set the iron to the lowest setting and gently press down. Work the iron back and forth across the photo, using a gentle touch as you do. After repeating this for a few minutes, place the photo under a book as it cools.
If you’d prefer a more delicate approach, you can create your own humidification chamber.
Fill a bin with a few centimetres of room-temperature water. Place a baking rack in the water and put your curled photos on the rack.
Close the lid and leave it for several hours. Check on the photo every so often and wipe off any droplets that collect on the photo’s surface.
After a while, the humidity will soften the dry, brittle paper of your old damaged photos. This makes the paper relax, straightening those curled edges.
When your photo has regained its flatness, lay it image side up on a towel to dry. If you like, you can cover it with a heavy book to make sure it stays flat.
Sometimes, your old pictures are beyond physical repair. If your photos are faded, discoloured, scratched, or otherwise damaged, you might have no other option but to restore them digitally.
You don’t need to be a Photoshop wizard to breathe life back into your old damaged photos. There are a few simple fixes that even beginners can do themselves.
Before you scan the photos in, make sure that they are free of all dirt and dust. If the edges are torn or tattered, cropping them out can make a big difference.
For discoloured or faded photos, you can easily correct this in any photo editor.
Use the brightness and contrast controls to lighten dark photos or to enhance sun-bleached pictures. Most photo editors also have a colour editor that you can use to correct the colours of the photograph.
If you have a little photo editing experience, you can use a Healing Brush to correct spots and scratches in the photo. After you finish retouching your photos, just be sure to get another copy. You can print it from home on high-quality photo paper or order professional prints from a print shop.
Are your old damaged photos beyond your capabilities? Are you worried that you might further damage your photos?
Then you need to come to the professionals. Besides offering expert photo restoration, we can take it even further.
We can colourise your black and white photos, retouch age marks on portraits, remove unwanted photos, or even turn your photos into dazzling fantasies. Contact us today!